27 September 2010

<OutputPath> in Web Deployment Project 2010

I use a build server and Web Deployment Project 2010 to deploy my build to the web server and recently updated… Another version, another problem. This time <OutputPath> doesn’t  work if you enter an absolute path. Quite why MS decided you must have only relative paths is beyond me but it throws out an error like:

C:\Program Files\MSBuild\Microsoft\WebDeployment\v10.0\Microsoft.WebDeployment.targets(288, 5): error MSB4184: The expression "[System.IO.Path]::GetFullPath(C:\TeamCity\buildAgent\work\dc097bd7ad70eb41\trunk\[WebDeploymentProjectFolderName]\[deployment path e.g. E:\ftproot\[App name]\)" cannot be evaluated. The given path's format is not supported.

For now I’ve overcome it by simply entering a large number of ..\ in the path that correspond to the location but I’m far from satisfied. I want to be able to choose to have the path on another drive for example! I think I’ll be implementing a solution using ‘AfterBuild’ (as per this answer on stackoverflow.com) although it annoys me that I can’t do it in the ‘normal’ place!

<PropertyGroup>  
    <CentralisedBinariesFolderLocation>c:\wherever</CentralisedBinariesFolderLocation>
</PropertyGroup>

<Target Name="AfterBuild">
    <Exec Command="xcopy /Y /S /F /R $(TargetPath) $(CentralisedBinariesFolderLocation)" />
</Target>

Which will copy it to the relevant location after the build.

26 September 2010

Continuous integration MSBuild and Framework 4.0

I use TeamCity as my integration server and got it working sweetly after some fiddling and help from Doug Rathbone's great post (thanks Doug). Then I wanted to use the Visual Studio 2010 Web Deployment Project to get it copied to my web server box after the build. I anticipated problems and of course they came thick and fast in the form of things like:
  • The specified task executable location "bin\aspnet_merge.exe" is invalid.
  • The specified task executable location "C:\Program Files\MSBuild\Microsoft\WebDeployment\v10.0\aspnet_merge.exe" is invalid.
  • The "CollectFilesinFolder" task was not found. Check the following…
  • The "Microsoft.WebDeployment.Tasks.AspNetMerge" task could not be loaded from the assembly…
etc. etc. I started to work through them one by one but I found the answer was to install the SDK and copy the .target files:
  1. Install windows SDK on your build server. Use web installer and unchecked everything except for ".NET Development Tools" depending on your target framework (version/framework):
    6.1 at
    http://www.microsoft.com/downloads/en/confirmation.aspx?familyId=e6e1c3df-a74f-4207-8586-711ebe331cdc&displayLang=en
    or 7.1/3.5 at
    http://www.microsoft.com/downloads/en/confirmation.aspx?familyId=c17ba869-9671-4330-a63e-1fd44e0e2505&displayLang=en
    or 7.1/4.0
    http://www.microsoft.com/downloads/en/details.aspx?FamilyID=6b6c21d2-2006-4afa-9702-529fa782d63b&displaylang=en#SystemRequirements.
  2. Copy the files from your dev box:
    C:\Program Files (x86)\MSBuild\Microsoft\VisualStudio\v10.0\Web
    and
    C:\Program Files (x86)\MSBuild\Microsoft\VisualStudio\v10.0\WebApplication
    to the equivalent paths on your build server.
  3. You'll also need to adjust the location of your ASPNet merge path so on the build machine edit:
    C:\Program Files (x86)\MSBuild\Microsoft\WebDeployment\v10.0\Microsoft.WebDeployment.targets
    Alter:
    <AspNetMerge
         ExePath="$(AspnetMergePath)"
    to C:\Program Files\Microsoft SDKs\Windows\v7.1\Bin\NETFX 4.0 Tools 
Hopefully this will help someone else out with the same issue.

15 September 2010

LinkSys WRT54GL Router with DD-WRT


In my opinion the most flexible powerful rooter/firmware for a discount price.
I had grown out of my Netgear router’s limited capability and needed something more powerful but didn’t have the budget for an enterprise solution so after some research I found out about a great Open Source project called DD-WRT which provides a replacement for factory installed firmware on some models of router.


Having chosen my firmware I then set about looking for some hardware to support it: this is perhaps the best way to choose hardware! DD-WRT supports many routers and you can do a search to see if yours is supported on their site. I decided on the Linksys WRT54GL as it seemed to fit my needs and budget. Sure it’s not the latest and greatest, but if you look into the details some of those models aren’t actually that great anyway.


NB: See this post for an important note about the router database.


You’ll find instructions on how to install your firmware on the DD-WRT wiki(together with warnings about the potential dangers too) but I heartily recommend this combination to anyone who is technically minded and able to follow clear instructions carefully. The result is a REALLY reliable powerful budget router, which is after all the core of most home/small office networks.


My thanks to the DD-WRT team for their excellent efforts.


Additional Tweaks
In addition tot he basic setup I also changed a few things to get mine running as I wanted it. Once installed, the on-board help is pretty good and searching the wiki and forum helped me to get these things right:
  • ‘CRON’ jobs: regular tasks the router will perform:
    NB: If they aren't working try the command in the shell (without root but with 'sh ' prefix) its most likely the cron time format is wrong.
    • Update time every hour starting at 00:50:
      */50 */1 * * * root ntpclient pool.ntp.org; stopservice process_monitor; startservice process_monitor
    • Create log file every hour starting at 00:00:
      * */1 * * * root /tmp/www/log_gen.sh
    • WOL a local server via LAN every hour between 6am and 9pm (in case the server or router go off at any stage during the day):
      * 6-21/1 * * * root /usr/sbin/wol –i [router’s internal IP address] [target’s MAC address]
      NB: the full path to "/usr/sbin/wol" is important. Simply "wol" will not work.
  • Time: Enable NTP and set time server to a value eg. uk.pool.ntp.org
    NB: Time is checked at boot and 120 seconds after only so if no internet connection then need a cron to update it periodically as above.
  • DDNS: If you need to access your router or network remotely e.g. for a VPN then sign up for a service such as http://www.dyndns.com then under Setup/DDNS enter your username and password.
  • DNS:
    • Set DNSMasq to do DNS so that you can internally resolve URLs e.g. smtp.mydomain.com see Wiki entry for more information.
    • SET Static DNS1 as 208.67.222.222
      DNS2 as 208.67.222.220 (Open Source DNS)
    • In Services/Services/Static Leases set your static IPs e.g. DNS server by MAC and name.
    • In Services/Services
      • If you have an Active Directory then set it as the primary DNS with:
        dhcp-option=6, x.x.x.x, y.y.y.y
        where: x.x.x.x = DNS1(AD server); y.y.y.y=DNS2(DD-WRT) Set the ADirectory DNS forwarder as the DD-WRT. Add strict-oder (ref and ref)
      • Do not set LAN Domain as it will append it to nslookups.
      • Additional DNSMasq Options and add a line like the following for each address to resolve: address=/prefix.mydomain.com/[local IP address here]
  • SSH: Consider enabling ssh (for local only access) so that you can login via putty to carry out more advanced tasks:
    Try enabling it with just a password first, then with a key, then add a passphrase.
    1. Use Puttygen to generate public/private key with passphrase:
      • Click Generate
      • Click over area and create key
      • Set key passphrase/confirm (this will be your root login)
    2. Enable SSH in Linksys web interface/Services/SecureShell/SSHd (only, no password etc.), paste in public key (ALL of it from Puttygen) and Set port e.g. 1024
    3. Start Putty set IP, port
    4. Enter file path of private key under Connection/SSH/Auth
    5. Click connect
    6. It should ask you for the username (root) and passphrase entered above (Shift Ins to paste into terminal window)
And once you’ve finished tweaking don’t forget to backup the settings: Admin/Backup/Backup button!

14 September 2010

Complain (Constructively) and Ye Shall Receive!

The story of one developer’s discussion with Microsoft about the Action Pack subscription changes and it's happy ending.
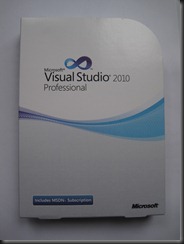
Visual Studio 2010
My shiny new VS 2010
Thank you Microsoft!

I’ve been an Action Pack subscriber for many years. If you don’t know about it, it’s a great way to legally enjoy a large suite of software produced by Microsoft. As a C# developer predominantly of web based solutions a great deal of my interest is with Visual Studio which used to be included in an add-on to the standard package.

Earlier this year they decided to shuffle the suite about and moved VS and Expression Suite into another package called “Action Pack Development and Design”. I wasn’t aware of this change, I guess their emails go into my SPAM folder, and I didn’t notice as I had tried out VS 2010 Express and liked it but had no need for the might of the full software. Then one day a project came along that required the full package, I dutifully went to the Partner’s website to download my copy as a fully paid up subscriber who’s subscription ends in April next year, some six months away. I navigated the Partner’s website (which I loath for it’s bad organisation, page errors and slow loads amongst other things) and when it wasn’t on the list of downloads I thought “mmm that’s odd”. I did some searching and discovered that in fact they had moved it to a new package. “No problem”, I thought “I’ll phone up and switch my subscription to the new one which is clearly designed for developers like me”, all the time thinking: “aren’t Microsoft great for recognising the need and importance of developers so they’ve even designed a subscription just for us”. Oh how wrong I was!

When I got through to the European call centre which is in Germany, a very polite and efficient man helpfully informed me that yes I could terminate my current subscription and start a new subscription BUT if I did that there would be no refund for the current subscription. “WHAT?!”, I said “I can change subscriptions but have to forfeit half a year’s subscription fees? That’s madness”. The options he gave me were:

  1. Terminate my current subscription and start a new one BUT forfeit the fee for the remainder of the year’s subscription (more than half of it)
  2. Wait for the current subscription expire in March 2011 then subscribe to the D&D package
  3. Buy VS2011 as a stand-alone license

To answer those options in order:

  1. I cannot accept that it is reasonable to expect me to forfeit HALF of my subscription just because Microsoft has decided to move a product from the package I’m subscribed to, to another one. How is that fair or reasonable?
  2. I cannot wait six months for the subscription to expire: by then my requirement will have evaporated.
  3. It does not make financial sense to purchase a single version of VS as a stand-alone product as I will continue to subscribe to the AP scheme anyway, so in effect I’d be purchasing it twice.

To put it another way if I’d subscribed to a newspaper delivery for a year but half way through wanted to change the newspaper the agent delivered I’d expect to be able to. Wouldn’t you? I could understand the fee being non-refundable if I was wanting to cancel my subscription but I wasn’t!

My Action Pack subscription runs from March and they changed it in May, so I don’t understand how they expected that to work: I would have either had to go for two months without one (presumably re-installing all my AP software with open source alternatives to avoid running it without a valid license); or pay for the whole year fully knowing that I’d be forfeiting TEN months of fees!! Apparently there was an offer available but it was only for 15% off the new package, which would not equate to the fees lost. Anyway I expressed this sense of wrong-doing to the man and after repeating the options a few times (he has to stick to the company line after all) I said I wasn’t happy at all and wanted to complain. At the time I thought this would be pointless, I even said to him “I’m sure I might as well write my complaint on a piece of paper, tear it up and throw it in the sea” but I was left with no other option. No way was I going to give up half a year’s subscription, on principal if nothing else. How did this fit with MS CEO Steve Ballmer's “Developers” Mantra?

I dutifully phoned the number I’ve been given and a helpful lady gave me an email address to write my complaint to. Despite feeling I was wasting my time I spent some time outlining my discontent in a detailed and constructive fashion and sent it off, making sure to make a note to re-contact her if she didn’t reply by a week later.

My first surprise was that I received a reply inside a few days from a very helpful man who had picked up my case. It wasn’t what I wanted to hear as it re-stated the options that the original support guy had given me and also that VS was never part of the original package. Needless to say I have disks of VS from my subscription going back before the 2005 version with “Action Pack” written clearly on the label so I scanned a couple of the 2008 ones and sent them to him. After a few days he came back and admitted his mistake (a refreshing change), re-stated that I can’t change subscriptions BUT that he didn’t want me to go without so was prepared to offer me a copy of VS 2010 Pro to use until my subscription comes up for renewal next year. Well you could have knocked me down with a feather!

I am not that reliant on the other parts of the package being so up-to-date, I find you can usually muddle through until the latest version is available with operating systems, MS SQL Server, Office etc but with Visual Studio you’re kind of stuck without the latest software. There are alternatives to VS of course but I’m not keen as that way a lot of tweaking lies. More drastically you can just change platforms. I’ve done it before: like many developers I’m somewhat ambivalent about platform, I’m just keen to develop on what’s best at the time, I’m not just a slave to one direction. Having said that at the moment the C# .Net platform is a clear winner in my book for most of what I want to do.

So many thanks to ‘A’ in the complaints department and kudos to Microsoft for responding positively to complaints and for recognising the need to support developers, even inconsequential ones like me, but come on Microsoft, think about what effect you’re going to have to those of us who are actually trying to legally use your software before you go swapping things about and making it impossible or financially implausible for users to switch.

Links
Action Pack: http://partner.microsoft.com/40016455
Action Pack Development and Design: http://partner.microsoft.com/40132997
Visual Studio Express: http://www.microsoft.com/express/ 
Alternatives to Visual Studio: http://web.archive.org/web/20071217202115/http://www.dotnetcoders.com/web/Articles/ShowArticle.aspx?article=49

11 September 2010

Rebirth of a TyTN II aka Kaiser

Installing Android on an HTC TyTN II aka Kaiser

In a previous post (Death of a TyTN II) I lamented the loss of my HTC TyTN II smart-phone. After it’s demise I resolved to get either an Android or iPhone (or Windows Mobile 7 if I could wait that long). However, after a brief discussion with my phone carrier (Orange) it transpired that because I had recently changed my contract subscription I was not eligible for an update to my phone until April 2011, some seven months wait. I’m a patient man but really this is pushing the boundaries. An alternative was to ‘buy out’ of my existing contract but that was prohibitively expensive.

Nokia 6700
Nokia 6700: Neat and reliable
but oh so limiting

Since the TyTN’s demise I have been using a Nokia 6700. To be honest I really like just having a phone that is reliable, has a long battery life and thin enough to fit in my pocket without bulging, especially when wearing shorts! However, after the honeymoon period was over (about a month) I started to miss the many things about my smart-phone that I used to enjoy, such as: being able to type lengthy emails without the frustration of finger strain of entering text via a number keypad; seamless syncing (the Nokia Ovi software is surely one of the worst pieces of software ever written?!); and the ability to read and create MS Office documents on the move.

The TyTN is no longer covered by insurance or warrantee but I thought “you’re no electronics genius but you must be able to work out what is wrong with it”. So I searched online for a technical manual for it and got out my screwdrivers. After a bit more searching I found a few users with similar problems. I had already thought that it was related to power so I began by looking into the USB socket on the device. After a brief panic that it might be the fuse between this and the main board (rendering the whole useless), I started to look in more detail at the socket itself. Using a torch and a magnifying glass I peered in and noticed that one of the pins appeared to have been bent to the back of the socket. I tried to bend it back into place with a pin but almost immediately it broke away. Clearly the phone will never charge from this socket ever again. However, other people have managed to replace it with success. I began to attempt to take off the old one but I’m not a good solderer so I abandoned that plan before I wrote it off completely. So for the time being I’ve resigned to use an old TyTN with a broken screen as a battery charger and just switch batteries whilst syncing via blue-tooth. This isn’t great but at least it works. I may yet attempt to replce the socket but I’m wary of breaking both devices!

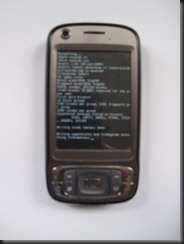
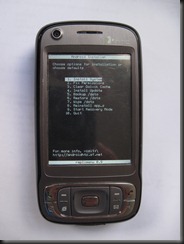
In the midst of all this searching for details on the TyTN I discovered much discussion about installing Android on them. So I decided to try this for myself. I wanted to keep the old Windows OS as there were various posts saying that Android on a TyTN wasn’t a production ready so I went for SD card Installation which seemed to be a breeze. Note this does not run inside Windows but rather re-boots into Android. I decided to use a TreeSize (link below) file to clear out my phone’s memory first:

  1. (Optional) Run the Treesize utility to delete large files using up space on the device.
  2. Ensure your SD card is formatted using FAT32 (mine wasn’t so I copied the files onto my PC, re-formatted the card as FAT32 and copied it all back).
  3. Download the files you need from the Android wiki (see below for link) and put them on the SD card in a root folder called “andboot”.
  4. Rename the file default-Kaiser.txt to default.txt (This contains options to tweak your display settings etc)
  5. Use File Explorer to browse to SD card/andboot
  6. Run the Haret program and select Run, then immediately hold down the button in the middle of the “D pad“ (collection of buttons at bottom of screen). NB: if you don’t do this it won’t go into the Installer and instead you’ll see a message “system.img not found” or similar. This had me stumped for a bit.
  7. It will then ask if you want to replace the OS and files. NB: This is related to the SD card and NOT your Windows OS on the device itself.
  8. If you opt to continue it will say “Formatting…” and then a load of text notification will come up, eventually returning you to the boot installer.
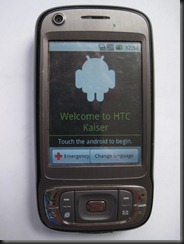
  9. Select Quit and Android should start to load up! If you see a load of colours in a cross then you’re in.

Next time you want to run it load up Haret via File Explorer and click ‘Run’. If you manage it you’ll see all sorts of weird display issues (the screen isn’t really big enough) and not everything works (e.g. camera doesn’t on mine) but the phone and sms messages worked as did WiFi and email. I’m just keen to be able to try out Android apps on a real device and now I can.

Links:

02 September 2010

Version Control and Continuous Integration with Visual Studio


Some notes on setting up this combo:
  • Subversion Version control
  • Development with Visual Studio, integrated with the version control with Visual SVN
  • Continuous integration with Team City
So here we go:
Version (Subversion) Control Server:
  • Install Visual SVN Server
    • Create a user
    • Use secure connections
    • Setup a repository eg [Project Name] with trunk etc
Development Machine:
  • Install Visual Studio if not already
  • Setup Subversion Server management with Tortoise
    NB to setup local working copy:
    • Connect using Repro Browser URL format described here and enter username/pw
    • Checkout a working copy over your existing directory NB: Use the ‘same’ folder ie. checkout [My Project\trunk] to [My Project\trunk] and it’ll warn its not empty
    • Right click on this (now version controlled) parent and click Tortoise SVN/Add
  • Install version control (Subversion) integration with Visual SVN Client (it’s well worth the modest price for the avoidance of hassle)
  • Install Web Deployment Projects
Continuous Integration Server:
  • Install target .Net Framework e.g. 4.0
  • Install Windows SDKs; copy MSBuild files from your dev machine and alter the MSBuild file (see this post)
  • Install Team City (Web Service and Build Agent)
    • NB: I had some issues with The Web Service not finding the Agent, but allowing the agent’s port in the firewall then adding it via Agents/Agent Push fixed it
      You may need to install psexec.exe first (I had to rename it to lower case)
  • Setup a project, build configuration
    • Version Control Settings: Auto on the server; set Checkout directory e.g. C:\TeamCity\[project name].[build config]
    • Build Step:Runner type Visual Studio; Solution  file is relative to the repository path so probably something like \trunk\[Project Name]\[Project Name].sln; (Build) Configuration e.g. Debug
    • VCS build trigger: when changes are checked in it will automatically fire a build.
  • Install Web Deployment Projects
  • You also need MVC if you're using it: http://www.asp.net/mvc/mvc3
Once you’ve got it building then it’s time to add a deployment project to deploy it to the IIS server
Web Deployment Projects
  • Install WDP on both your development and build server from here if you haven’t already (it’s used by MSBuild).
  • Right click on the web project to be deployed and select ‘Add Web deployment project’ and name it accordingly. I use [project name].Deploy
  • Ensure you have sufficient Configurations in Build/Configuration Manager. e.g. I use:
    Debug: local development
    Alpha: LAN development server
    Beta: ‘Live’ testing
    Release
  • In Team City you need to have a config related to each Build Configuration:
    • Go to Project Configuration, Click 'Create Template from Configuration'
    • Edit the template to tokenise some values:
      • Version Control Source:enter %checkout.directory% instead of the existing value, you'll then replace the original value in the TC Build Config for the build e.g.  Release
      • Build Step: Enter %configuration.name% in Configuration
      • Build Triggering: remove the build trigger, as you'll re-create them in the derived configurations.
    • Edit the original TC configuration to set the build parameters of the tokenised values e.g.:
      • checkout.directory: C:\TeamCity\[projectname].Debug
      • configuration.name: Debug
      • Build Trigger: e.g. create a VCS auto build
    • Create a derived 

01 September 2010

Run Visual Studio as Administrator

Visual Studio must be run as administrator if it is to work properly e.g. if you are using IIS to debug.
To ensure it always does:

Windows 8+
For the following files carry out the method below:
To open project and solution files as admin:
C:\Program Files (x86)\Common Files\microsoft shared\MSEnv\vslauncher.exe

To open program itself (e.g. via shortcut)
C:\Program Files (x86)\Microsoft Visual Studio 12.0\Common7\IDE\devenv.exe


  1. Run Troubleshoot Compatibility
  2. Select manual Program compatibility
  3. The program requires additional privileges
  4. Test select ok


Windows Pre 8
  • Go to the program file at:
    C:\Program Files\Microsoft Visual Studio\Common7\IDE\devenv.exe
  • Right click on the file and select Properties/Compatibility tab
  • Optionally click on “Change settings for all users"
  • Select ‘Run this program as administrator’.